
What are various dental services?
Dental Crowns
|
55-64 year old man treated with Dental Crown
Before  After After
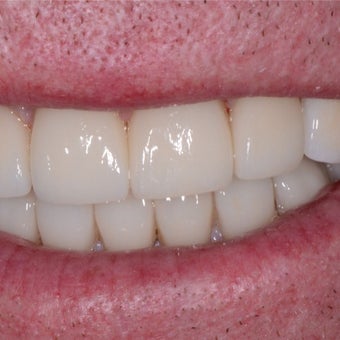
What is a Dental Crown? 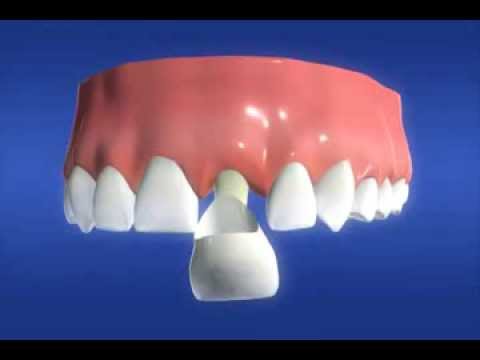 Over time, your teeth can get damaged. This can happen for a variety of reasons, like tooth decay, injuries or just use over time. Your teeth can lose their shape or size. Dental crowns are tooth-shaped “caps” that can be placed over your tooth. Think of it like a snug hat for your tooth. The crown restores the tooth’s shape, size, strength and appearance. The dental crown is cemented into place on your tooth and it covers the visible portion of the tooth. Why would I need a dental crown? You may need a dental crown for several reasons, including: Protecting a weak tooth (possibly from decay) from breaking or to keep the weak tooth together if parts of it are cracked. Restoring a broken tooth or a severely worn down tooth. Covering and supporting a tooth with a large filling and not much tooth remaining. Holding a dental bridge in place. Covering misshapen or severely discolored teeth. Covering a dental implant. Covering a tooth that’s been treated with a root canal. What are onlays and 3/4 crowns? There are many types of crowns that can be used on your teeth. Onlays and 3/4 crowns are types of dental crowns that don’t cover as much of your underlying tooth as traditional dental crowns. A traditional crown will cover your entire tooth. Onlays and 3/4 crowns may be appropriate when you still have a solid tooth structure. It’s considered a more conservative approach compared to full coverage of your crown. In this procedure, your dentist removes the affected area and performs a reshaping of the tooth to receive the crown. What are dental crowns made of? Permanent crowns can be made out of many different materials. These materials can include: Metal: There are several metals that can be used in dental crowns, including gold, palladium, nickel and chromium. Metal crowns rarely chip or break, last the longest in terms of wear down and only require a small amount of your tooth to be removed. They can also withstand biting and chewing forces. The metallic color is the main drawback of this type of crown. Metal crowns are a good choice for out-of-sight molars. Porcelain-fused-to-metal: This type of dental crown can be matched to the color of the teeth that’s next to the crown. They have a more natural tooth color. However, sometimes the metal under the crown’s porcelain cap shows through as a dark line. Other cons include the chance of the crown’s porcelain portion chipping or breaking off and the crown wearing down the teeth opposite it within the mouth. This wear on the other teeth specifically affects the teeth that come into contact with the crown on the top and bottom of your mouth when it’s closed. Porcelain-fused-to-metal dental crowns can be a good choice for front or back teeth. All-resin: Dental crowns made out of resin are generally less expensive than other crown types. However, they wear down over time and are more likely to break than porcelain-fused-to-metal crowns. All-ceramic or all-porcelain: These types of dental crowns provide the best natural color match compared to any other crown type. They’re also a good choice if you have metal allergies. However, they aren’t as strong as porcelain-fused-to-metal crowns. They can also wear down the teeth opposite them in the mouth a little more than metal or resin crowns. All-ceramic crowns are a good choice for front teeth. Pressed ceramic: These dental crowns have a hard inner core. Pressed ceramic dental crowns replace the metal liner that’s used in the all-ceramic crown-making process. Pressed ceramic crowns are capped with porcelain, which provides the best natural color match. They’re also more long-lasting than an all-porcelain crown. How is my tooth prepared for a dental crown? You will typically have two visits to the dentist to prepare for a dental crown. In some cases, you may have a dental crown made in your dentist’s office. The first visit During the first visit, the tooth that’s going to receive the crown is examined and prepared. X-rays are taken of the tooth and the bone around it. Your dentist might have to do a root canal treatment before your dental crown procedure if there’s any: Tooth decay. Risk of infection. Injury to the tooth’s pulp. Pulp is the soft tissue inside your teeth that contains blood vessels, nerves and connective tissue. The tooth that’s receiving the crown will be filed down across the top and sides. This will make space for the crown itself. The amount of tooth that gets filed away depends on the type of crown you have. All-metal dental crowns are thinner and don’t need as much of the tooth removed as all-porcelain or porcelain-fused-to-metal crowns. If too much of your tooth is missing — due to damage or decay — a filling material can be used to “build up” enough tooth structure for the crown to cover. After reshaping the tooth, a paste or putty is used to make a copy (also called a impression) of the tooth that’s going to receive the crown. Impressions of the teeth above and below the tooth that’s getting the dental crown will also be made. This is done to make sure that the crown will not affect your bite. The impressions are sent to a dental laboratory. The laboratory makes the crowns and usually returns them to the dentist’s office in two to three weeks. During this first office visit, your dentist will make a temporary crown to cover and protect the prepared tooth while you’re waiting on the permanent crown. The second visit At the second visit, the permanent crown is placed on your tooth. First, the temporary crown is removed and the fit and color of the permanent crown is checked. If everything is okay, a local anesthetic (“numbing” drug) is sometimes used to numb the tooth and the new crown is permanently cemented in place. Same-day dental crowns Dental crowns can also be made in a dentist’s office if your dentist has the equipment. This process starts off similarly to the traditional way a crown is made — the first steps are to remove decay and shape the tooth for a perfect fit inside the crown. After these steps, the actual making of the crown is different. In the same-day procedure, a scanning device (a “wand”) is used to take digital pictures of the tooth inside your mouth. The computer’s software creates a 3D model of the tooth from these pictures. The digital design is then sent to another in-office machine that carves the shape of the crown out of a block of ceramic. This method of making a dental crown is called computer-aided design/computer-aided manufacturing (CAD/CAM). In less than 15 minutes, the crown is ready to be cemented into place. What problems can develop with a dental crown? There are several issues that you might experience over time with your crown, including: Discomfort or sensitivity: A newly crowned tooth may be sensitive immediately after the procedure as the anesthesia begins to wear off. If the crowned tooth still has a nerve in it, you may experience some heat and cold sensitivity. Your dentist might recommend that you brush your teeth with toothpaste designed for sensitive teeth. Pain or sensitivity that happens when you bite down usually means that the crown is too high on the tooth. If this is the case, call your dentist. This problem is easily fixed. Chipped crown: Crowns made of all porcelain can sometimes chip. Small chips can be repaired and the crown can remain in your mouth. The dental crown may need to be replaced if the chip is large or when there are many chips. Loose crown: Sometimes, the cement that holds the crown on can wash out from under the crown. Not only does this allow the crown to become loose, it allows bacteria to leak in and cause decay to the tooth that remains. If your crown feels loose, contact your dentist’s office. Crown falls off: A dental crown can actually fall off. When this happens, it’s usually due to an improper fit or a lack of cement. If this happens to you, reach out to your dentist’s office immediately. Your dentist will give you specific instructions on how to care for your tooth and crown until you can come in for an appointment. The dentist may be able to re-cement your crown in place. If the crown can’t be put back in place, a new crown will need to be made. Allergic reaction: The metals used to make dental crowns are often a mixture of several metals. You can have an allergic reaction to the metal or porcelain that’s used in the dental crown. However, this is extremely rare. Dark line on crowned tooth next to the gum line: You might see a dark line next to the gum line of your crowned tooth. This is normal — particularly if you have a porcelain-fused-to-metal crown. This dark line is simply the metal of the crown showing through. How long do dental crowns last? On average, dental crowns last between five and 15 years. The life space of a crown can depend on the amount of “wear and tear” the crown is exposed to, how well you follow oral hygiene practices and personal mouth-related habits. These mouth-related habits can include things like: Grinding or clenching your teeth. Chewing ice. Biting your fingernails. Using your teeth to open packaging. Does a crowned tooth require any special care? A crowned tooth doesn’t need any special care. However, the underlying tooth still needs to be protected from decay or gum disease. Because of this, you should continue to follow good oral hygiene practices. These practices include brushing your teeth twice a day and flossing once a day — especially around the crown area where the gum meets your tooth. Also, avoid biting on hard surfaces with porcelain crowns (for example, chewing ice or popcorn hulls) to prevent cracking the porcelain. How much do dental crowns cost? The costs of dental crowns can vary depending on where you live and the type of crown you pick. Porcelain crowns, for example, are typically more expensive than gold crowns, which are typically more expensive than porcelain-fused-to-metal crowns. In general, dental crowns can range in cost from $800 to $1,500 or more per crown. The cost of crowns is not usually fully covered by insurance. To be certain, check with your specific dental insurance company. Introducing new Crest Gum and Enamel Repair Intensive Clean toothpaste. Created after years of research by Crest scientists, it’s been specially formulated for healthier gums and helps repair weakened enamel. |
Root canals
|
A root canal is a dental treatment to treat infection in the centre of a tooth before it spreads and causes an abscess. The tooth's nerve and pulp are removed and the inside of the tooth is cleaned and sealed. The tooth doesn’t need the nerve to stay healthy. The only difference is that tooth won’t feel hot or cold food or drink. Why does the pulp need to be removed? When nerve tissue or pulp is damaged, it breaks down and bacteria begin to multiply within the pulp chamber. The bacteria and other decayed debris can cause an infection or abscessed tooth. An abscess is a pus-filled pocket that forms at the end of the roots of the tooth. An abscess occurs when the infection spreads all the way past the ends of the roots of the tooth. In addition to an abscess, an infection in the root canal of a tooth can cause: Swelling that may spread to other areas of the face, neck, or head Bone loss around the tip of the root Drainage problems extending outward from the root. A hole can occur through the side of the tooth with drainage into the gums or through the cheek with drainage into the skin. What damages a tooth's nerve and pulp in the first place? Nerve and pulp can become irritated, inflamed and infected due to deep decay, repeated dental procedures on a tooth and/or large fillings, a crack or chip in the tooth, or trauma to the face. What are the signs that a root canal is needed? Sometimes no symptoms are present; however, signs to look for include: Severe toothache pain upon chewing or application of pressure Prolonged sensitivity/ pain to heat or cold temperatures (after the hot or cold has been removed) Discolouration (a darkening) of the tooth Swelling and tenderness in the nearby gums A persistent or recurring pimple on the gums What happens during the procedure? A root canal requires one or more dentist surgery visits and can be performed by a dentist or endodontist. An endodontist is a dentist who specialises in the causes, diagnosis, prevention and treatment of diseases and injuries of the human dental pulp or the nerve of the tooth. The choice of which type of dentist to use depends to some degree on the difficulty of the root canal procedure needed in your particular tooth and the general dentist's comfort level in working on your tooth. Your dentist will discuss who might be best suited to perform the work in your particular case. The first step in the procedure is to take an X-ray to see the shape of the root canals and determine if there are any signs of infection in a surrounding bone. Your dentist or endodontist will then use local anaesthesia to numb the area near the tooth. Anaesthesia may not be necessary, since the nerve is dead, but most dentists still anesthetise the area to make the patient more relaxed and at ease. What happens during the procedure? Next, to keep the area dry and free of saliva during treatment, your dentist will place a rubber dam (a sheet of rubber) around the tooth. An access hole will then be drilled into the tooth. The pulp along with bacteria, the decayed nerve tissue and related debris is removed from the tooth. The cleaning out process is accomplished using root canal files. A series of these files of increasing diameter are each subsequently placed into the access hole and worked down the full length of the tooth to scrape and scrub the sides of the root canals. Water or sodium hypochlorite is used periodically to flush away the debris. Once the tooth is thoroughly cleaned, it is sealed. Some dentists like to wait a week before sealing the tooth. For instance, if there is an infection, your dentist may put a medication inside the tooth to clear it up. Others may choose to seal the tooth the same day it is cleaned out. If the root canal is not completed on the same day, a temporary filling is placed in the exterior hole in the tooth to keep contaminants out between appointments. At the next appointment, to fill the interior of the tooth, a sealer paste and a rubber compound called gutta percha is placed into the tooth's root canal. To fill the exterior access hole created at the beginning of treatment, a filling is placed. The final step may involve further restoration of the tooth. Because a tooth that needs a root canal often is one that has a large filling or extensive decay or other weakness, a crown, crown and post or other restoration often needs to be placed on the tooth to protect it, prevent it from breaking and restore it to full function. Your dentist will discuss the need for any additional dental work with you. How painful is the procedure? Root canal procedures have the reputation of being painful. Actually, most people report that the procedure itself is no more painful than having a filling done. What should one expect after the root canal? For the first few days following the completion of treatment, the tooth may feel sensitive due to natural tissue inflammation, especially if there was pain or infection before the procedure. This sensitivity or discomfort usually can be controlled with over-the-counter pain medications such as ibuprofen. Most patients can return to their normal activities the next day. Until your root canal procedure is completely finished, that is to say, the permanent filling is in place and/or the crown, it's wise to minimise chewing on the tooth under repair. This step will help avoid recontamination of the interior of the tooth and also may prevent a fragile tooth from breaking before the tooth can be fully restored. As far as oral health care is concerned, brush and floss as you would normally and see your dentist at the usual regular intervals. How successful are root canals? Root canal treatment is highly successful; the procedure has more than a 95% success rate. Many teeth fixed with a root canal can last a lifetime. Also, because the final step of the root canal procedure is application of a restoration such as a crown or a filling, it will not be obvious to onlookers that a root canal was performed. Complications of a root canal Despite your dentist's best efforts to clean and seal a tooth, new infections might emerge. Among the likely reasons for this include: More than the normally anticipated number of root canals in a tooth (leaving one of them uncleaned). An undetected crack in the root of a tooth. A defective or inadequate dental restoration that has allowed bacteria to get past the restoration into the inner aspects of the tooth and recontaminate the area. A breakdown of the inner sealing material over time, allowing bacteria to recontaminate the inner aspects of the tooth. Sometimes retreatment can be successful, other times endodontic surgery must be tried in order to save the tooth. The most common endodontic surgical procedure is an apicoectomy or root-end resection. This procedure relieves the inflammation or infection in the bony area around the end of your tooth that continues after endodontic treatment. In this procedure, the gum tissue is opened, the infected tissue is removed, and sometimes the very end of the root is removed. A small filling may be placed to seal the root canal. Alternatives to a root canal Saving your natural teeth is the very best option, if possible. Your natural teeth allow you to eat a wide variety of foods necessary to maintain proper nutrition. The root canal procedure is the treatment of choice. The only alternative to a root canal procedure is having the tooth extracted and replaced with a bridge, implant, or removable partial denture to restore chewing function and prevent adjacent teeth from shifting. These alternatives not only are more expensive than a root canal procedure but require more treatment time and additional procedures to adjacent teeth and supporting tissues. Since some of the reasons why the nerve of a tooth and its pulp become inflamed and infected are due to deep decay, repeated dental procedures on a tooth and/or large fillings, following good oral hygiene practices (brushing twice a day, flossing at least once a day, and booking regular dental visits) may reduce the need for a root canal procedure. Trauma resulting from a sports related injury can be reduced by wearing a mouth guard. |
Tooth Extraction
Dental elevators to remove the tooth.


These instruments are used to loosen up and detach the gum tissue that surrounds the tooth that’s being removed. And also, to whatever extent possible, sever the tooth’s periodontal ligament (the ligament that runs from tooth to bone and binds a tooth in its socket). Periodontal Ligament: What Is It? The periodontal ligament (PDL) is the soft tissue union between your teeth and the bone. Many people think teeth are held in by the bone and gum tissue, but the truth is that the PDL is what really holds your teeth in place. The periodontal ligament is made of various collagen types and has a neurovascular component that is extremely narrow yet very complex. Although called a ligament, your PDL is not like the ligaments that surround an articulating joint. However, this special ligament plays a crucial function in your overall oral health. What Does the Periodontal Ligamen (PDL) Do? The periodontal ligament does not support the outer gum tissues and is only found between the root part of the tooth and the adjacent bone. This complex tissue allows the tooth to function under the load of chewing and absorb excess pressure from clenching and grinding. The ligament is also involved in tooth movement and aids in the eruption of the tooth. The PDL is also what makes orthodontic tooth movement possible. If the tooth were directly connected to the bone, the tooth would function similarly to a dental implant and not be able to move. Because the tooth is held in the socket by the periodontal ligament and not a direct bone-to-tooth interface, it can usually be extracted without removing any significant areas of the jawbone. The periodontal ligament also allows the tooth to adapt to forces from tooth grinding (also known as bruxism) or other jaw clenching habits. The ligament can enlarge and allow the tooth to become loose. Once the excessive forces on the tooth are reduced, the PDL will heal, and tooth mobility will decrease. The Periodontal Ligamen and Overall Oral Health Advanced gum disease can lead to the destruction of bone and the loss of the periodontal ligament. In areas where the ligament has been lost, the adjacent bone is no longer attached to the tooth and cannot provide any support. The PDL is also prone to periodontal inflammation and cannot be easily regenerated. Even with a bone graft placement, if the periodontal ligament is not restored in the area, the bone graft may not work. The periodontal ligament serves a quiet but meaningful role within your mouth. It's important to make sure that you're practicing good oral hygiene practices by brushing twice a day and cleaning between your teeth daily. This will help you prevent gum disease and keep your periodontal ligaments strong and healthy as they support your teeth. What are examples of various dental instruments? Dental examination instruments Retractors Local anesthesia Dental drills Dental laser Dental torque wrench Burs Restorative instruments Burnishers Pluggers Periodontal scalers Prosthodontic instruments Extraction/surgical instruments Orthodontic instruments Endodontic instruments A dental chair is essential for dental services. A dental chair is classified separately to dental instruments. Tooth Extraction What is required for tooth extraction? Physician or dentist. Secretary who will profile the patient. Nurse who will do x-ray for the patient. Dental chair. Local anesthesia with injection. Dental mirror and forceps to examine the tooth. Extraction forceps, dental elevators to remove the tooth. Gauze. Prescription. How is tooth extraction done? Complete the profile of the patient. Identify the tooth that needs to be extracted. Do not confuse third molar and second molar. In some cases, at the age of 48, third molar has not erupted or is prominent. Take an x-ray of the tooth to be extracted. Examine the tooth with dental mirror and dental instrument. Is tooth extraction required? If yes, follow these steps. Does the individual have any allergies or underlying medical condition? If no, follow these steps. Give local anesthesia at three locations around the tooth to be extracted. Take two dental extracting instruments. What two dental instruments are required for tooth extraction? Extraction forceps Dental elevators. Hold the tooth with extraction forceps. Place dental elevators between gum and tooth on outer side. Push down the dental elevator. Pull up on inner side with dental forceps. Tooth gets extracted. Within five minutes, the procedure is completed. Ask patient to rinse the mouth. Put a gauge on the location of the extracted tooth. Ask patient to close the mouth. Tell the patient to remove the gauze after 12 hours, replacing after every 5 hours with new gauze. Give patient extra gauze in case required. Instructions after tooth extraction. a) Dental Elevators These instruments look like small screw drivers. Their design is such that they can be wedged into the ligament space between the tooth and its surrounding bone (as shown in our picture). As the elevator is forced into and twisted around in this space, the tooth is pressed and rocked against the bone. This helps to expand the socket. It also helps to separate the tooth from its ligament. As this work is continued, the tooth gradually becomes more and more mobile in its socket. In some cases, the dentist may be able to completely remove the tooth with just this tool. If not, the dentist will switch to the use of extraction forceps to complete the job. b) Extraction Forceps Extraction forceps are pliers-like instruments used to grasp teeth. A dentist will usually have a number of different ones on hand, each having a design that's specifically tailored for certain types of teeth. When they're used, the dentist will grasp the tooth with the forceps and then firmly and deliberately rock it back and forth as much as it will. Because the bone that surrounds the tooth is compressible, the socket will expand. In addition to a rocking motion, the dentist will also rotate the tooth back and forth. This twisting action helps to rip and tear the tooth from the ligament that binds it in place. At some point, the socket will be enlarged enough, and the ligament torn enough, that the tooth can be easily removed. |
Dental Cleanings
|
Do you need a deep dental cleaning?
How does a dentist — and your insurance company — decide you need a deep cleaning? What are possible early signs of dental trouble? Toothache Sensitive teeth Bleeding or Sore gums Mouth Sores Bad breath Jaw pain Dry mouth What are possible early signs of gingivitis? Bright red, swollen or tender gums Bleeding gums when brushing or flossing Bad breath Receding or soft gums Brush your teeth twice a day. I brush my teeth after meals twice a day. Use mouthwash once a day. Floss teeth once a day. Dental cleaning in four sessions by a physician or dentist is also recommended once in 5 years. How often should dental cleaning by a physician or dentist be done? How should dental cleaning go ahead by a physician or dentist? |
|
What are dental cleanings (scale and polish) and why have them? Dental cleanings involve removing plaque (soft, sticky, bacteria infested film) and tartar (calculus) deposits that have built up on the teeth over time. your teeth are continually bathed in saliva which contains calcium and other substances which help strengthen and protect the teeth. While this is a good thing, it also means that we tend to get a build-up of calcium deposits on the teeth. This chalky substance will eventually build up over time, like limescale in a pipe or kettle. Usually it is tooth coloured and can easily be mistaken as part of the teeth, but it also can vary from brown to black in colour. If the scale, or calculus (tartar, as dentists like to call it) is allowed to accumulate on the teeth it will unfortunately provide the right conditions for bacteria to thrive next to the gums. The purpose of the cleaning and polishing is basically to leave the surfaces of the teeth clean and smooth so that bacteria are unable to stick to them and you have a better chance of keeping the teeth clean during your regular home care. Also it leaves your teeth feeling lovely and smooth and clean, which is nice when you run your tongue around them. Actually, come to think of it, there’s nothing worse than someone you fancy running their tongue around your teeth and finding a piece of spinach or something! Still, if they’re hungry… The professional cleaning of teeth is sometimes referred to as prophylaxis (or prophy for short). It’s a Greek word which means “to prevent beforehand” – in this case, it helps prevent gum disease. How are dental cleanings done? The dental hygienist or dentist uses specialized instruments to gently remove these deposits without harming the teeth. The instruments which may be used during your cleaning, and what they feel like, are described below. Ultrasonic instrument Commonly used first is an ultrasonic instrument which uses tickling vibrations to knock larger pieces of tartar loose. It also sprays a cooling mist of water while it works to wash away debris and keep the area at a proper temperature. The device typically emits a humming or high pitched whistling sound. This may seem louder than it actually is because the sound may get amplified inside your head, just like when you put an electric toothbrush into your mouth. The ultrasonic instrument tips are curved and rounded and are always kept in motion around the teeth. They are by no means sharp since their purpose is to knock tartar loose and not to cut into the teeth. It is best to inform the operator if the sensations are too strong or ticklish so that they can adjust the setting appropriately on the device or modify the pressure applied. With larger deposits that have hardened on, it can take some time to remove these, just like trying to remove baked-on grime on a stove that has been left over a long time. So your cleaning may take longer than future cleanings. Imagine not cleaning a house for six months versus cleaning it every week. The six-month job is going to take longer than doing smaller weekly jobs. Fine hand tools Once the larger pieces of tartar are gone, the dental worker will switch to finer hand tools (called scalers and curettes in dental-speak) to remove smaller deposits and smoothen the tooth surfaces. These tools are curved and shaped to match the curves of the teeth. They allow smaller tartar deposits to be removed by carefully scraping them off with a gentle to moderate amount of pressure. Just like taking a scrubbing brush to a soiled pot, the dental worker has to get the areas clean and smooth. Polishing Once all the surfaces are smooth, the dental worker may polish your teeth. Polishing is done using a slow speed handpiece with a soft rubber cup that spins on the end. Prophylaxis (short for prophy) paste – a special gritty toothpaste-like material – is scooped up like ice cream into the cup and spun around on the teeth to make them shiny smooth. Fluoride Your dentist may also apply fluoride. This is the final, and my favorite part of the dental cleaning! Fluoride comes in many different flavours such as chocolate, mint, strawberry, cherry, watermelon, pina colada and can be mixed and matched just like ice cream at a parlour for a great taste sensation! Make no mistake though, this in-office fluoride treatment is meant for topical use only on the surfaces of the teeth and swallowing excessive amounts can give a person a tummy ache as it is not meant to be ingested. Fluoride foam or gel is then placed into small, flexible foam trays and placed over the teeth for 30 seconds. Afterwards the patient is directed to spit as much out as possible into a saliva ejector. The fluoride helps to strengthen the teeth since the acids from bacteria in dental tartar and plaque will have weakened the surfaces. It is best not to eat, drink or rinse for 30 minutes after the fluoride has been applied. Is it going to be painful? Most people find that cleanings are painless, and find the sensations described above – tickling vibrations, the cooling mist of water, and the feeling of pressure during “scraping” – do not cause discomfort. A lot of people even report that they enjoy cleanings and the lovely smooth feel of their teeth afterwards! There may be odd zingy sensations, but many people don’t mind as they only last a nanosecond. Be sure to let your dentist/hygienist know if you find things are getting too uncomfortable for your liking. They can recommend various options to make the cleaning more enjoyable. Painful cleaning experiences can be caused by a number of things: a rough dentist or hygienist, exposed dentine (not dangerous, but can make cleanings unpleasant), or sore gum tissues. In case you may have had painful cleaning experiences in the past, switching to a gentle hygienist/dentist and perhaps a spot of nitrous oxide can often make all the difference. You could also choose to be numbed. If you find the scaling a bit uncomfortable because the gum tissues (rather than the teeth themselves) are sensitive, topical numbing gels can be used. |
Reasons for extracting teeth
|
Although permanent teeth can last a lifetime, teeth that have become damaged or decayed may need to be removed or extracted. Other reasons include: A crowded mouth. Sometimes dentists extract teeth to prepare the mouth for orthodontics. The goal of orthodontics is to properly align the teeth, which may not be possible if your teeth are too big for your mouth. Likewise, if a tooth cannot break through the gum (erupt) because there is not room in the mouth for it, your dentist may recommend extraction. Infection. If tooth decay or damage extends to the pulp -- the centre of the tooth containing nerves and blood vessels -- bacteria in the mouth can enter the pulp, leading to infection. If infection is so severe that antibiotics do not cure it, extraction may be needed to prevent the spread of infection. Risk of infection. If your immune system is compromised (for example, if you are receiving chemotherapy or are having an organ transplant) even the risk of infection in a particular tooth may be reason to remove the tooth. Gum disease. If periodontal disease -- an infection of the tissues and bones that surround and support the teeth -- have caused loosening of the teeth, it may be necessary to extract the tooth or teeth. What to expect with tooth extraction Dentists and oral surgeons (dentists with special training to perform surgery) perform tooth extractions. Before removing the tooth, your dentist will give you an injection of a local anaesthetic (or pain medicine) to numb the area where the tooth will be removed. If you are having more than one tooth extracted or a tooth is impacted, your dentist may use a general anaesthetic, this will prevent pain throughout your body and make you sleep through the procedure. If the tooth is impacted, the dentist will cut away gum and bone tissue that cover the tooth and then, using forceps, grasp the tooth and gently rock it back and forth to loosen it from the jaw bone and ligaments that hold it in place. Sometimes, a tooth that is difficult to remove must be taken out in pieces. Once the tooth has been extracted, a blood clot usually forms in the socket. The dentist will pack a gauze pad into the socket and get you to bite down on it to help stop the bleeding. Sometimes the dentist will place a few stitches -- usually self-dissolving -- to close the gum edges over the extraction site. Sometimes, the blood clot in the socket breaks loose, exposing the socket – causing a painful condition called dry socket. If this happens, your dentist will probably place a special dressing over the socket for a few days to protect it as a new clot forms. What to tell your dentist before you have a tooth extracted Although having a tooth out is usually very safe, the procedure can allow harmful bacteria into the bloodstream. Gum tissue is also at risk of infection. If you have a condition that puts you at high risk of developing a severe infection, you may need to take antibiotics before and after the extraction. Before having a tooth removed, let your dentist know your complete medical history, the medications and supplements you take, and if you have one of the following: Damaged or man-made heart valves A congenital heart defect An impaired immune system Liver disease (cirrhosis) An artificial joint, such as a hip replacement A history of bacterial endocarditis After you've had a tooth extracted Following an extraction, your dentist will send you home to recover. Recovery typically takes a few days. The following can help minimise discomfort, reduce the risk of infection and speed recovery. Take painkillers as prescribed or over the counter products suggested by your dentist - such as ibuprofen, aspirin or paracetamol. Bite firmly but gently on the gauze pad placed by your dentist to reduce bleeding and allow a clot to form in the tooth socket. Follow your dentist's advice about how long to leave the pad in place after the extraction and what to do if the gauze pad becomes soaked with blood. Apply an ice bag to the affected area immediately after the procedure to keep down swelling. Apply ice for 10 minutes at a time. Ask your dentist about how to do this safely. Relax for at least 24 hours after the extraction. Limit activity for the next day or two. Avoid rinsing or spitting for six hours after the extraction to avoid dislodging the clot that forms in the socket. After six hours, gently rinse your mouth with a solution made of half a teaspoon of salt in a glass of warm water. Do not drink from a straw for the first 24 hours. Do not smoke, as it can inhibit healing. Eat softer foods (such as soup or yoghurt) the day after the extraction. Gradually add solid foods to your diet as the extraction site heals. When lying down, prop your head up with pillows. Lying flat may prolong bleeding. Continue to brush and floss your teeth, and brush your tongue, but avoid the extraction site. Doing so will help prevent infection. When to call the dentist It is normal to feel some pain after the anaesthesic wears off. For 24 hours after having a tooth out, you should also expect some swelling and residual bleeding. However, if pain is severe or bleeding continues for more than four hours after the extraction, you should call your dentist. You should also call your dentist if you experience any of the following: Signs of infection, including fever and chills Nausea or vomiting Redness, swelling or excessive discharge from the affected area Cough, shortness of breath or chest pain The initial healing period usually takes about one to two weeks. New bone and gum tissue will grow into the gap. Longer term, however, having a tooth (or teeth) missing can cause the remaining teeth to move, affecting your bite and making it difficult to chew. For that reason, your dentist may advise replacing the missing tooth or teeth with an implant, fixed bridge or denture. |
College of Dental Medicine
| For whom are these training programs meant in the state or outside the state around the world? |
| Primary care physician |
| General dentist |
| Dental public health clinics |
| Endodontist |
| Oral and maxillofacial radiologist |
| Oral medicine |
| Oral pathologist |
| Oral and maxillofacial surgeon |
| Orthodontist |
| Pediatric dentist/pedodontist |
| Periodontist |
|
What is a Dentist? What does a Dentist do? What is the workplace of a Dentist like? What is a Dentist? A dentist, also known as a dental surgeon, is a health care practitioner who specializes in the diagnosis, prevention, and treatment of diseases and conditions of the oral cavity. A Dentist is a specialized type of Doctor. Also known as: Doctor of Medicine in Dentistry, Family Dentist, Doctor of Dental Surgery, Doctor of Dental Medicine, General Dentist. A dentist is a physician whose practice is in the field of dentistry. This involves the mouth, teeth, gums and related areas. Some studies have shown that diseases relating to the teeth and gums can be indicative or indicators of some health issues. The health of the mouth is essential to the general overall health of the body and a dentist will encourage and assist What types of dentists are there? Specialty (dentistry) General Dentist A general dentist is your primary care dental provider. This dentist diagnoses, treats, and manages your overall oral health care needs, including gum care, root canals, fillings, crowns, veneers, bridges, and preventive education. Dental public health - The study of dental epidemiology and social health policies. Endodontics - Root canal therapy and study of diseases of the dental pulp. Oral and maxillofacial pathology - The study, diagnosis, and sometimes the treatment of oral and maxillofacial related diseases. Oral and maxillofacial radiology - The study and radiologic interpretation of oral and maxillofacial diseases. Oral and maxillofacial surgery - Extractions, implants, and MaxilloFacial surgery which also includes correction of congenital facial deformities. Orthodontics and dentofacial orthopaedics - The straightening of teeth and modification of midface and mandibular growth. Periodontology (periodontics) - Study and treatment of diseases of the gums (non-surgical and surgical) as well as placement and maintenance of dental implants Pediatric dentistry (formerly pedodontics) - Dentistry for children Prosthodontics - Dentures, bridges and dental implants(restoring/placing). Some prosthodontists further their training in "oral and maxillofacial prosthodontics", which is the discipline concerned with the replacement of missing facial structures, such as ears, eyes, noses, etc. What is a dental cleaning? Be sure to add a dental visit to this year's spring cleaning list. A professional dental cleaning at least twice a year can improve your oral health, reports the Academy of General Dentistry (AGD), an organization of general dentists dedicated to continuing dental education. The AGD strongly recommends that a dentist or hygienist perform a dental cleaning every six months. This professional dental cleaning reinforces the home-care oral health regimen of brushing and flossing and gives the dentist an opportunity to locate areas in the mouth that may need special attention. People who regularly practice good oral hygiene at home with proper brushing and flossing techniques typically do not experience discomfort during a cleaning. However, those who have neglected their oral hygiene habits may experience some discomfort or sensitivity during a dental cleaning. The dentist can use a topical anesthetic before the cleaning to alleviate any discomfort. During a dental cleaning, you’ll receive diagnostic and preventive services from your dentist as well as any needed educational information. Diagnostic services may include: •Reviewing and updating medical history, including information about heart problems, pregnancy, diabetes and medications, which may have an impact on your oral health •Evaluation of gum tissue •Checking biting, chewing and swallowing patterns •X-rays or examination of teeth to detect decay •Referral to specialists for specific treatment Preventive services may include: •Removal of plaque and tartar •Stain removal •Fluoride application •Sealants (for children) •Polishing teeth, including fillings and crowns •Cleaning and adjustment of dentures and partial dentures Educational services may include: •Tooth brushing and flossing instructions •Nutritional counseling •Recommendations for future treatment: when to return for follow-up hygiene treatment, periodontal (gum) concerns or restorative options •Evaluation of self-care effectiveness •Tobacco-cessation counseling |
Dental Chair

|

|
|
Knowing Your Teeth

Types of teeth
Eruption time of deciduous teeth

| Deciduous | Eruption Time |
| Central Incisor | 6-12 months |
| Lateral Incisor | 9-16 months |
| Canine | 16-23 months |
| First Molar | 13-19 months |
| Second Molar | 23-33 months |
Eruption time of permanent teeth

| Permanent Teeth Eruption Time | |
| Central Incisor | 6-8 years |
| Lateral Incisor | 6.5-9 years |
| Canine | 8.5-12.5 years |
| First Premolar | 8-12 years |
| Second Premolar | 8.5-13 years |
| First Molar | 5-7 years |
| Second Molar | 10-14 years |
| Third Molar (Wisdom Tooth) | 17-25 years |
Functions of teeth
|
Chewing food Teeth are a part of the digestive system. They are used for chewing food. Pronunciation and articulation. Pronunciation is basically controlled by the vocal cord, but it needs to work together with the teeth to pronounce accurately. Keep pleasant appearance Teeth can keep our facial profile. Without teeth, our face will look collapsed. If teeth are kept healthy, our appearance will even be better. Reserve space for permanent teeth to erupt Normally, underneath each deciduous tooth, there is a developing permanent tooth. Deciduous teeth reserve space for permanent teeth to erupt. When permanent teeth erupt, deciduous teeth will naturally fall off and be replaced by permanent teeth. If deciduous teeth are lost prematurely, the adjacent teeth will then move toward the empty space, leaving insufficient room for the permanent teeth to erupt. The permanent teeth may have poor alignment. Premature loss of a deciduous teeth leading to poor alignment of teeth due to space loss |
Shapes of teeth
| Name | Shape | Function |
Incisor 
| Chisel shape | Chopping food |
Canine  | Sharp, pointy | Tearing food |
Premolar(Does not exist in deciduous teeth) 
|
The occlusal surface is wide and uneven.
Diamond shape with pits and fissures on it. | Grinding food |
Molar 
| The occlusal surface is wide and uneven. Rectangular shape with pits and fissures on it. | Grinding food |
Abnormal tooth structures
Supernumerary Tooth 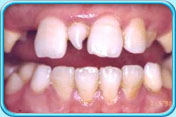 Leong's Premolar
  Fused teeth
Fused teeth 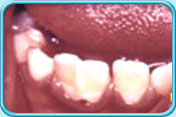
Supernumerary Tooth A supernumerary tooth is an abnormally developed extra tooth. It is mostly related to heredity. It can appear at any region of the dental arch, but most commonly erupts in between the upper front teeth, or is completely embedded inside the jaw. Oral problems associated with supernumerary teeth: •Failure of eruption of permanent teeth •Delayed eruption of permanent teeth •Displacement of permanent tooth •Irregular alignment of teeth If the above situations happen, the supernumerary tooth needs to be extracted. If the supernumerary tooth cannot erupt, surgical extraction of the supernumerary tooth is required. Leong's Premolar A Leong's premolar differs from an ordinary premolar by having some tooth structure projecting from its occlusal surface. The structure is very fragile and is liable to fracture. If it is not properly treated after fracture, the pulp may undergo necrosis due to an infection and may lead to dental abscess formation. In order to prevent this from happening, preventive treatment is advocated. The dentist will, according to the tooth condition, either reinforce the fragile structure or remove the structure and restore the defect. Fused teeth When two teeth are united during the developmental stage by the union of their tooth germs, a fused tooth will be formed. There will be a groove on the surface of the tooth, and it is commonly found on deciduous front teeth.When there is a deciduous fused tooth, a succeeding permanent tooth may be missing. |
Anatomy and Development of the Mouth and Teeth
|
Anatomy and development of the mouth and teeth:
Children's teeth begin developing in the fetus. Good nutrition from the mother during pregnancy is important in the development of the teeth. The mother's diet should have adequate amounts of calcium, phosphorus, vitamin C, and vitamin D. Certain medications, such as tetracycline, should not be taken by the mother while she is pregnant as this can cause harm to the developing teeth of the embryo. There are four main stages of development of the tooth: The first stage begins in the fetus at about six weeks of age. This is when the basic substance of the tooth forms. Next, the hard tissue that surrounds the teeth is formed, around three to four months of gestation. After the child is born, the next stage occurs when the tooth actually protrudes through the gum. Finally, there is the loss of the primary "baby" teeth. Parts of the tooth: Each tooth has four main parts, including the following: enamel - the outer layer of the tooth. dentin - the inner layer and the main part of the tooth. pulp - part of the inside of the tooth that contains the nerve. root - the part of the tooth that secures it into the jaw.  When will my child's teeth come in? While every child is different, most of the primary teeth (baby teeth) come in between the ages of four and 12 months. The following are general guidelines for the eruption of the baby teeth: The first tooth to erupt is usually a middle, front tooth on the lower jaw, known as the central incisor. This is followed by the second central incisor on the lower jaw. Next, the four upper incisors usually come in. The above is followed by the first four molars, and the remaining bottom two lateral incisors. Lateral incisors are beside of (lateral to) the central incisors. Then the cuspids, or the pointed teeth, appear. Usually, after the child reaches two years old, the four second molars (the last of the baby teeth) appear. The teeth on the upper jaw usually erupt one to two months after the same tooth on the lower jaw. There are a total of 20 primary teeth. Usually, about one tooth erupts per month once the teeth have started coming in. There is normally a space between all the baby teeth. This leaves room for the larger permanent teeth to erupt. Eruption of teeth happens at different times for each child. Below, we have provided average ages of eruption and shedding: 
When will my child's permanent teeth come in? Your child will begin losing his/her primary teeth (baby teeth) around the age of 6. The first teeth to be lost are usually the central incisors. This is then followed by the eruption of the first permanent molars. The last baby tooth is usually lost around the age of 12, and is the cuspid or second molar. There will be a total of 32 permanent, or adult, teeth. 
|
Teeth care and treatments
|
Brushing teeth: Daily brushing of the teeth removes plaque and prevents cavities. Flossing teeth: Using floss or an approved dental gum cleaner cleans teeth below the gum line, where brushing cannot reach. Teeth cleaning: Professional teeth cleaning, as often as recommended, may help prevent tooth and gum disease. Tooth filling: Drilling out the diseased part of a tooth and packing the space with a mineral filling can prevent a cavity from destroying the tooth. Root canal: The deep pulp of a tooth is drilled out, cleaned and filled. A root canal is done when damage to the teeth has affected the deep pulp. Tooth extraction: If a tooth is too damaged to repair with a filling or root canal, it may be removed. Wisdom teeth are often extracted to prevent displacement of the other teeth. Braces: An artificial device or system that places teeth under tension for a long period of time. Eventually, braces can help crooked teeth become realigned. Mouth guard: A plastic mouthpiece can provide protection from teeth grinding and injury while playing sport. Dental sealants: A plastic sealant applied to the teeth can help block bacteria from hiding in crevices on teeth surfaces. Sealants can help prevent cavities. Teeth whitening: Over-the-counter and professional chemical treatments can bleach teeth to a brighter white. Tooth sensitivity is the most common side effect |
10 tooth brushing mistakes
|
1. Not using the right toothbrush
2. Not picking the right bristle Bristles should be sturdy enough to remove plaque but not hard enough when used properly to damage the teeth. 3. Not brushing often enough or long enough You should clean your teeth at least twice a day, especially last thing at night. However, if you eat or drink sugary foods, you ought to clean more often. Cleaning for two minutes is usually sufficient to remove plaque. 4. Brushing too often or too hard While brushing your teeth twice a day is ideal, doing it more frequently than that may not be beneficial. Brushing more than four times a day may seem compulsive. Excessive brushing could expose the root of the tooth to irritation, and that could in turn irritate the gums. Brushing too vigorously can also erode tooth enamel. The trick is to brush gently for two to three minutes. 5. Not brushing correctly Place the head of your toothbrush against your teeth, then tilt the bristle tips to a 45 degree angle against the gum line. Move the brush in small circular movements, several times, on all the surfaces of every tooth. Brush the outer surfaces of each tooth, upper and lower, keeping the bristles angled against the gum line. Use the same method on the inside surfaces of all your teeth. Brush the biting surfaces of the teeth. To clean the inside surfaces of the front teeth, tilt the brush vertically and make several small circular strokes with the front part of the brush. 6. Starting in the same place each time Many people start brushing the same part of their mouth over and over, dentists find. It’s better to start in a different place each time so that the same teeth are not left till last -- by that time you may be running out of steam. 7. Skipping inner tooth surfaces Most people forget to brush the inner surfaces of teeth -- the surface that your tongue presses against. The plaque harboured there is just as damaging as the plaque on the front. The most commonly skipped area, dentists say, is the inner surface of the front teeth. 8. Not following up with a rinse of the brush Bacteria can grow on an unrinsed toothbrush. Then the next time you brush your teeth, you may actually put old bacteria back in your mouth. Rinsing the toothbrush after you brush will also help remove any leftover toothpaste. 9. Not letting the toothbrush dry out If you have a toothbrush that's perpetually damp, it will cultivate more bacteria. If the bristles stay soggy, you can misshape them as you use the brush. You could keep two brushes so that one is always dry. 10. Not changing the toothbrush often enough A visual inspection of the bristles is better than sticking to any strict timescale for changing your brush. |
Hydrogen Peroxide as an Oral Debriding Agent (teeth, dentist, mouth)
|
Although hydrogen peroxide isn't exactly a powerful antiseptic like alcohol or chloride compounds, its strength is in its oxidation. It releases oxygen in a burst that works to debride, or clear debris, very effectively. Toothbrushes can be stored or cleaned in a peroxide solution before and after brushing, and studies have found that peroxide is useful in keeping bacteria counts lower in dental office water lines used for oral rinsing Not only is hydrogen peroxide a proven weapon in the fight against bacteria, it's also been shown to fight gingivitis, or inflamed and bleeding gums. H2O2 prevents bacteria buildup and plaque, both contributors to gingivitis. This is also great news for bad breath: Better oral health means fresher breath, and the oxidizing action of hydrogen peroxide really enables it to get into the crooks and nooks of teeth, gums and the tongue where bacteria tend to hang out and multiply. Safety issues relating to the use of hydrogen peroxide in dentistry Hydrogen peroxide is used widely in professionally and self-administered products. Hydrogen peroxide is a highly reactive substance which can damage oral soft tissues and hard tissues when present in high concentrations and with exposures of prolonged duration. This report provides an overview of health issues relating to the use of hydrogen peroxide, with an emphasis on safety with prolonged exposure to low concentrations of peroxide products. There is good evidence for the safety of hydrogen peroxide when used at low concentrations on a daily basis over extended periods of time, in self-administered oral health care products such as dentifrices and mouthrinses. These low concentrations neither damage oral hard or soft tissues, nor do they pose a significant risk of adverse long-term effects. Caution should be exercised with the increasingly higher concentration peroxide products used for ‘walking’ or ‘power’ bleaching due to the possibility of chemical irritation of oral soft tissues with injudicious use. The volumes of material and application times should be controlled carefully. Thorough education of patients is particularly important with self-applied gels because of the lack of professional supervision with such products. Such education is part of the duty of care of the dentist who supplies bleaching gels for at-home use. Table 1. Exposure to hydrogen peroxide
The Benefits of Hydrogen Peroxide and its Many Uses Hydrogen peroxide is the only germicidal agent composed only of water and oxygen. Like ozone, it kills disease organisms by oxidation! Hydrogen peroxide is considered the worlds safest all natural effective sanitizer. It kills microorganisms by oxidizing them, which can be best described as a controlled burning process. When hydrogen peroxide reacts with organic material it breaks down into oxygen and water. Whiten Clothes – An Alternative to Beach Add a cup of Peroxide to white clothes in your laundry to whiten them. Peroxide is great to get rid of blood stains on clothes and carpets. If there is blood on clothing, just pour directly on the spot, let it sit for about a minute, then rub and rinse with cold water. Repeat if necessary. Health: Your body makes hydrogen peroxide to fight infection which must be present for our immune system to function correctly. White blood cells are known as Leukocytes. A sub-class of Leukocytes called Neutrophils produce hydrogen peroxide as the first line of defense against toxins, parasites, bacteria, viruses and yeast. Rejuvenating Detoxifying Bath: Use about 2 quarts 3% hydrogen peroxide to a tub of warm water. Soak at least 1/2 hour, adding hot water as needed to maintain a comfortable water temperature. Foot Fungus: To cure a foot fungus, simply spray a 50/50 mixture of hydrogen peroxide and water on them (especially the toes) every night and let dry. Douche: Add 2 capfuls of 3% hydrogen peroxide in warm distilled water once to twice a week to remove even chronic yeast infections. Colonic or Enema: For a colonic, add 1 cup (8 ozs.) 3% H202 to 5 gallons warm water. (Do not exceed this amount) For an enema, add 1 tablespoon of 3% H202 to a quart of warm distilled water. Infections: Soak any infections or cuts in 3% for five to ten minutes several times a day. Even gangrene that would not heal with any medicine has been healed by soaking in hydrogen peroxide. Put half a bottle of hydrogen peroxide in your bath to help rid boils, fungus or other skin infections. Bird Mites Infections: Patients infected by tiny mites report that hydrogen peroxide effectively kills the mites on their skins. They spray it on their skin a couple of times (with a few minutes in between the applications) with amazing results. Sinus Infections: A tablespoon of 3% hydrogen peroxide added to 1 cup of non-chlorinated water can be used as a nasal spray. Depending on the degree of sinus involvement, one will have to adjust the amount of peroxide used. Wound Care: 3% H2O2 is used medically for cleaning wounds, removing dead tissue, and as an oral debriding agent. Peroxide stops slow (small vessel) wound bleeding/oozing, as well. Some sources recommend soaking infections or cuts for five to ten minutes several times a day. However, washing and rinsing action is sufficient. You shouldn’t leave the solution on open tissue for extended periods of time as, like many oxidative antiseptics, hydrogen perioxide causes mild damage to tissue in open wounds. Therefore it is important to use with caution. Personal Care: Mouthwash / Tooth Care: Healing Properties: Take one capful (the little white cap that comes with the bottle) and hold in your mouth for 10 minutes daily, then spit it out. You will not have canker sores and your teeth will be whiter. If you have a terrible toothache and cannot get to a dentist right away, put a capful of 3% hydrogen peroxide into your mouth and hold it for 10 minutes several times a day. The pain will lessen greatly. Mouthwash: Many people don’t realize that hydrogen peroxide makes a very effective and inexpensive mouthwash. Use 3% H202 – add a dash of liquid chlorophyll for flavoring if desired. Toothpaste: Use baking soda and add enough 3% H202 to make a paste. Or, just dip your brush in 3% H202 and brush. Soak your toothbrush in hydrogen peroxide to keep them free of germs. Toothbrush: Soaking your toothbrush in hydrogen peroxide will help keep them free of harmul germs. Tooth Ache: Hydrogen peroxide is not a pain killer; however, as an anti-viral, antibacterial and anti-fungal agent, it is effective at treating the pathogen that is causing the infection. The following is from my own personal experience: My dentist wanted to give me a root canal some time ago as one tooth was inflamed and, in her opinion, would die. I felt some discomfort but told her that I would give it chance to heal. I rinsed with hydrogen peroxide (several times a day) as well ascoconut oil (once a day). The discomfort went away and I have had no further problems with the tooth. Tooth Whitening: Having used 3% Hydrogen Peroxide as a mouth wash for sometime ago, I am thrilled to note that my teeth have been beautifully and effortlessly whitened. I used to pay so much for professional whitening, those silly strips and uncomfortable trays. Live and learn. NOTE: Do not swallow any peroxide. When the peroxide rinse is done, be sure to rinse out your mouth with water. Colonic or Enema: For a colonic, add 1 cup (8 ozs.) 3% H202 to 5 gallons warm water. (Do not exceed this amount) For an enema, add 1 tablespoon of 3% H202 to a quart of warm distilled water. Hair Lightening: Peroxide is a bleaching agent and is used for lightened hair. Dilute 3% hydrogen peroxide with water (50 / 50) and spray the solution on your wet hair after a shower and comb it through. You will not have the peroxide burnt blonde hair like the hair dye packages, but more natural highlights if your hair is a light brown, faddish, or dirty blonde. It also lightens gradually so it’s not a drastic change. Contact Lenses: Hydrogen peroxide is used as a disinfectant in CIBA Vision’s Clear Care no rub contact lens cleaning solution, due to its ability to break down the proteins that build up on the lense from the eye’s immune response, resulting in increased comfort for those with sensitive eyes. Sanitizing / Disinfectant / Cleaning Straight or Diluted Hydrogen Perioxide: Clean your counters and table tops with hydrogen peroxide to kill germs and leave a fresh smell. Simply put a little on your dishrag when you wipe, or spray it on the counters. Use hydrogen peroxide to clean glass and mirrors with no smearing. Keep a spray bottle of 3% (straight) to disinfect the interior of the refrigerator and kids’ school lunch boxes. In the Dishwasher: Add 2 oz. of 3% hydrogen peroxide to your regular washing formula. Fill a spray bottle with a 50/50 mixture of 3% hydrogen peroxide and water and keep it in every bathroom to disinfect without harming your septic system like bleach or most other disinfectants will. After rinsing off your wooden cutting board, pour or spray hydrogen peroxide (and then vinegar) on it to kill salmonella and other bacteria. I use peroxide to clean my mirrors with, there is no smearing. Combination of vinegar and hydrogen peroxidemake a cheap, effective and non-toxic disinfectant agent and is said to be more effective at killing pathogens than bleach. As it is non-toxic, you can use it to disinfect fruits and vegetables, as well as pet toys, equipment and cages. In tests run at Virginia Polytechnic Institute and State University, pairing Vinegar and Hydrogen Peroxide mists, kills virtually all Salmonella, Shigella, or E. coli bacteria on heavily contaminated food and surfaces. Directions: You need TWO spray bottles. DO NOT MIX the solutions together. Put straight vinegar in one and straight hydrogen peroxide in the other spray bottle. NOTE: Light destroys peroxide rather quickly. It’s best to leave it in its original bottle and screw in a spray head. DO NOT DILUTE THEM. Remember for any sanitizer to work properly, the surface has to be clean before you use it. When you want to sanitize a surface (vegetables, cutting board, counters, sink, cages, toys. toilets, floors, etc.), spray one (it doesn’t matter which one you use first) on the surface, then you spray on the other. When they mix, for a brief time the chemical action of the two make a very powerful sanitizer. You can rinse off the surface afterwards, if you want, but the result is non-toxic. Fortunately it is cheap. BTW, we use it in the bathroom to sanitize the counters, toilets, floors, etc. Sanitizing Drinking Water Mold: Clean with hydrogen peroxide when your house becomes a biohazard after its invaded by toxic mold, such as those with water damage. Humidifiers/Steamers: Use 1 pint 3% hydrogen peroxide to 1 gallon of water. Laundry / Stain Removing: Stain Remover: 3% Hydrogen Peroxide is the best stain lifter if used fairly soon – although blood stains as old as 2 days have been successfully lifted with Hydrogen Peroxide. Although it will bleach or discolor many fabrics. If a little peroxide is poured onto the stain it will bubble up in the area of the blood, due to a reaction with catalase. After a few minutes the excess liquid can be wiped up with a cloth or paper towel and the stain will be gone. 3% H2O2 must be applied to clothing before blood stains can be accidentally “set” with heated water. Cold water and soap are then used to remove the peroxide treated blood. Washing/Laundry: You can also add a cup of hydrogen peroxide instead of bleach to a load of whites in your laundry to whiten them. If there is blood on clothing, pour directly on the soiled spot. Let it sit for a minute, then rub it and rinse with cold water. Repeat if necessary. Peroxide is a perfect alternate solution to keep those clothes white. Also, when chlorinating clothes, they tend to wear out faster – peroxide won’t do that. Food Preparation: Vegetable Soak: Use as a vegetable wash or soak to kill bacteria and neutralize chemicals. Add 1/4 cup 3% H202 to a full sink of cold water. Soak light skinned (light lettuce) 20 minutes, thicker skinned (like cucumbers) 30 minutes. Drain, dry and refrigerate. Prolongs freshness. If time is a problem, spray vegetables (and fruits) with a solution of 3%. Let stand for a few minutes, rinse and dry. Meat Sanitizing: You can also use it to rinse off your meat before cooking. Leftover tossed salad: Spray with a solution of 1/2 cup water and 1 Tbsp. 5%. Drain, cover and refrigerate. Marinade: Place meat, fish or poultry in a casserole (avoid using aluminium pans). Cover with a dilute solution of equal parts of water and 3% H202. Place loosely covered in refrigerator for 1/2 hour. Rinse and cook. Sprouting Seeds: Add 1 ounce 3% hydrogen peroxide to 1 pint of water and soak the seeds overnight. Add the same amount of hydrogen peroxide each time you rinse the seeds. Grades of Hydrogen Peroxide A) 3.5% Pharmaceutical Grade: This is the grade sold at your local drugstore or supermarket. This product is not recommended for internal use. It contains an assortment of stabilizers which shouldn’t be ingested. Various stabilizers include: acetanilide, phenol, sodium stanate and tertrasodium phosphate. B) 6% Beautician Grade: This is used in beauty shops to color hair and is not recommended for internal use. C) 30% Reagent Grade: This is used for various scientific experimentation and also contains stabilizers. It is also not for internal use. D) 30% to 32% Electronic Grade: This is used to clean electronic parts and not for internal use. E) 35% Technical Grade: This is a more concentrated product than the Reagent Grade and differs slightly in that phosphorus is added to help neutralize any chlorine from the water used to dilute it. F) 35% Food Grade: This is used in the production of foods like cheese, eggs, and whey-containing products. It is also sprayed on the foil lining of aseptic packages containing fruit juices and milk products. THIS IS THE ONLY GRADE RECOMMENDED FOR INTERNAL USE. G) 90%: This is used as an oxygen source for rocket fuel. Only 35% Food Grade hydrogen peroxide is recommended for internal use. At this concentration, however, hydrogen peroxide is a very strong oxidizer and if not diluted, it can be extremely dangerous or even fatal. Any concentrations over 10% can cause neurological reactions and damage to the upper gastrointestinal tract. There have been two known fatalities in children who ingested 27% and 40% concentrations of H202. Another reports tells of a 26 month old female who swallowed one mouthful of 35% H202. She immediately began vomiting, followed by fainting and respiratory arrest. Fortunately, she was under emergency room care and although she experienced erosion and bleeding of the stomach and esophagus, she survived the incident. When she was re-examined 12 days later, the areas involved had healed (J Toxicol Clin Toxicol 90;28(1):95-100). Personal note: As with ANY food, drug, or supplement, using the product according to instructions is key to safety. If someone uses too much, then of course ramifications may be felt. We’ve NEVER heard of ANY harmful side effects from the correct usage of Food Grade hydrogen peroxide.In dire cases of disease, intraveneous use may be recommended. If you would like to find a doctor in your area trained in the use of intravenous H202 infusion, contact the International Bio-Oxidative Medicine Foundation (IBOM), P.O. Box 13205, Oklahoma City, OK 73113 at (405) 478-4266. They can provide names and addresses of doctors using the procedure in your area. 35% Food Grade H202 must be…. 1) handled carefully (direct contact will burn the skin- immediate flushing with water is recommended). 2) diluted properly before use. 3) stored safely and properly (after making a dilution the remainder should be stored tightly sealed in the freezer). One of the most convenient methods of dispensing 35% H202 is from a small glass eye dropper bottle. These can be purchased at your local drugstore. Fill this with the 35% H202 and store the larger container in the freezer compartment of your refrigerator until more is needed. Store the eye dropper bottle in the refrigerator. The generally recommended dosage is outlined in the chart below. The drops are mixed with either 6 to 8 ounces of distilled water, juice, aloe vera juice or gel. (Don’t use chlorinated tap water to dilute the peroxide!) |
Are there any other dental services?
Last Updated: August 26, 2021